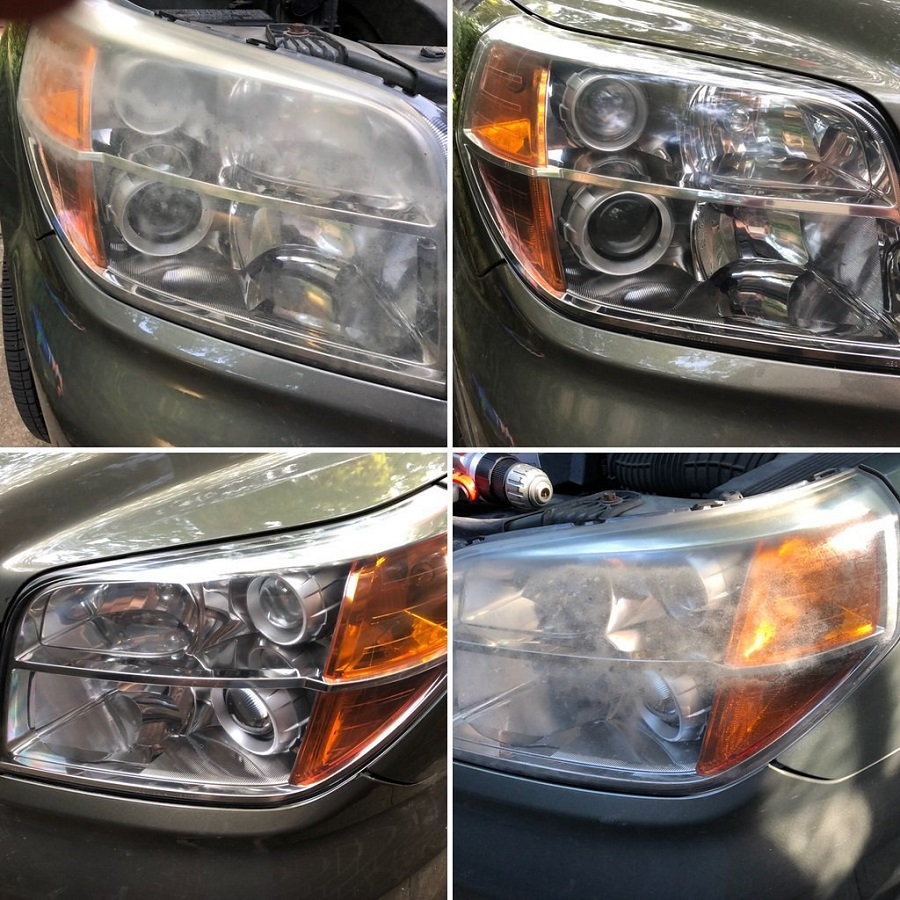
Professional headlight adjustment – How to adjust the headlights
Properly professional headlight adjustments are crucial for safe and efficient driving at night. Over time, headlights can become misaligned due to various factors, such as vibrations, accidents, or normal wear and tear. While it is recommended to have a professional adjust your headlights, it’s useful to understand the process yourself. In this guide, we will provide a comprehensive step-by-step explanation of the professional headlight adjustment process. By following these instructions carefully, you can ensure your headlights are correctly aligned, providing optimal visibility and safety during nighttime driving.
Find a Suitable Location:
Choose a location with a level surface, preferably inside a garage or in an area away from bright lights. It is crucial to have a flat and stable surface to accurately assess and adjust the headlight bulb. Additionally, ensure that the vehicle is parked on a level ground and the tires are properly inflated.
Gather the Necessary Tools:
To perform a professional headlight adjustment, you will need the following tools:
- Masking tape: To mark the areas on the wall or target board where the beams of light will be projected.
- Measuring tape or ruler: To measure the distance between the headlights and the wall or target board.
- Screwdriver or wrench: To adjust the headlight aiming screws or levelers, depending on your vehicle’s make and model.
- Level surface or alignment rack: To ensure the vehicle is level during the adjustment process.
Prepare the Vehicle:
Prepare the vehicle for the headlight adjustment process by following these steps:
- Clear any obstructions: Remove any protective covers or grilles that may obstruct the headlights during the adjustment process.
- Check headlight aimers: Some modern vehicles may have built-in headlight aimers, which can be calibrated and used during the adjustment process. Check your vehicle’s manual for information on how to use them, if applicable.

Mark the Wall or Target Board:
To properly aim the headlights, mark the wall or target board with masking tape. The tape should represent both the vertical and horizontal centerlines of the vehicle. Use a measuring tape or ruler to ensure accurate positioning of the tape.
- Vertical centerline: Start by placing a strip of tape vertically on the wall, aligning it with the vertical center of the vehicle. The tape should extend from the ground to a height higher than the car headlights.
- Horizontal centerline: Next, place a strip of tape horizontally on the wall, aligning it with the horizontal center of the vehicle. The tape should be parallel to the ground and centered between the two headlights.
Position the Vehicle:
Position the vehicle at an appropriate distance from the wall or target board. The exact distance will vary based on your vehicle’s make and model. Refer to your vehicle’s manual for the recommended distance or follow the general guideline of approximately 25 feet (7.6 meters) from the wall.
Set the Aim Height:
To set the aim height, perform the following steps:
- Turn on the headlights: Turn on the headlights to activate the low beam setting. This will allow you to adjust the aim height accurately.
- Measure aim height: Measure the height from the ground to the center of each headlight. Compare these measurements to the vehicle’s specifications in the manual. Adjust the aim height screws or levelers as needed to align the headlights with the recommended aim height position.
Adjust the Horizontal Aim:
To adjust the horizontal aim of the headlights, follow these steps:
- Cover one headlight: Cover one of the headlights with a cloth or cardboard to isolate the adjustment for the other headlight.
- Locate the horizontal adjustment screws: Depending on your vehicle, the horizontal adjustment screws are typically located on the headlight housing or nearby. Consult your vehicle’s manual for the precise location.
- Align the beams: Adjust the horizontal aim screw to align the beam of light to the center of the horizontal tape on the wall. The light beam should not extend beyond the vertical edges of the tape.

Adjust the Vertical Aim:
To adjust the vertical aim of the headlights, follow these steps:
- Locate the vertical adjustment screws: The vertical adjustment screws are typically located on the headlight housing, near the top or bottom. Refer to your vehicle’s manual for the exact location.
- Align the beams: Adjust the vertical aim screw to align the beam of light to the center of the vertical tape on the wall. The light beam should not extend above or below the horizontal tape.
- Repeat for the other headlight: Adjust the vertical aim screw of the other brightest car headlights to align its beam of light with the center of the vertical tape.
Test the Headlights:
After completing the adjustments, it is crucial to test the headlights to ensure proper alignment and aim. Take the vehicle for a short test drive in various conditions, such as city streets and highways, to verify the effectiveness and accuracy of the adjustments.
Advantages of professional headlight
Properly adjusted headlights are essential for safe and efficient driving, especially during nighttime. While it is possible to adjust headlights manually, seeking professional headlight adjustment offers several advantages.
Accurate Alignment:
One of the primary advantages of professional headlight adjustment is the accuracy of the alignment process. Professional technicians have the expertise and equipment to ensure that the headlights are properly aligned, allowing for precise beam patterns and coverage. Accurate alignment helps minimize blind spots, ensuring optimal visibility of the road and surrounding areas. This boosts driver confidence and reduces the risk of accidents caused by limited visibility.

Proper Aiming:
Professional headlight adjustment also ensures that the headlights are correctly aimed, avoiding unnecessary glare or ineffective illumination. Technicians use precise equipment to align the headlights at the correct height and angle, resulting in a focused and well-directed beam of light. Proper aiming reduces the risk of blinding oncoming drivers, providing a safer road environment for all. It also optimizes the range and intensity of the headlights, enhancing visibility at night and during adverse weather conditions.
Improving Visibility:
One of the primary advantages of professional headlight adjustment is the noticeable improvement in visibility. By aligning and aiming the headlights accurately, professional adjustment enhances the driver’s field of vision. This is particularly important in low-light situations, such as driving at night or in foggy conditions, where visibility is naturally reduced. Improved visibility allows drivers to perceive potential hazards, road conditions, and pedestrians more clearly, reducing the likelihood of accidents and ensuring a safer driving experience.
Conclusion:
While it is recommended to have a professional perform the headlight adjustment, understanding the process can be beneficial. By following this comprehensive step-by-step guide, you can safely and properly adjust your vehicle’s headlights. Remember to gather the necessary tools, select a suitable location, and follow the exact procedures for marking, positioning, and adjusting the headlights. With a properly aligned and aimed set of headlights, you can enhance visibility, ensure safety, and enjoy optimal performance during nighttime driving.
Related Posts
Fixing Headlight Condensation Issues Effectively

RGB Light – Make Your Car Unique and Shiny